Many gardeners in Sri Lanka ask “why plants stop growing” or develop stunted growth despite regular care. In fact, the FAO reports that nutrient imbalances -whether from too little or too much fertilizer can make crops weak and stunted. Soil that is deficient in key nutrients will not support vigorous growth. This blog explores the ten most common causes of slow or halted growth, with practical organic solutions. We draw on agricultural research and the experience of Eco Agri Solutions’ experts to help you diagnose problems and revive your plants naturally.
To boost plant health, we focus on sustainable, eco-friendly approaches: enriching soil with organic matter, using natural pest controls, and matching plants to their conditions. Wherever possible we cite reliable sources (government, academic, or international agencies) to back our advice, so you can trust the information. Our goal is to help Sri Lankan gardeners and farmers understand “why plants stop growing” and how to fix issues without resorting to harsh chemicals. Let’s start with a quick overview of common plant growth problems.
Common Reasons Why Plants Stop Growing (Quick Overview)
1. Poor Soil Quality & Nutrient Deficiency – Lack of essential nutrients (nitrogen, phosphorus, potassium, etc.) or poor soil structure can stunt growth.
2. Overwatering or Underwatering – Too much water leads to root rot, while too little water causes stress and wilting.
3. Inadequate or Excessive Light – Insufficient sunlight makes plants “leggy” and weak; too much intense sun causes leaf burn.
4. Incorrect Soil pH Levels – If pH is too low (acidic) or too high (alkaline), key nutrients become unavailable to plants.
5. Pests and Diseases – Aphids, caterpillars and fungal diseases can sap strength, leading to slow growth.
6. Root Bound or Limited Space – Plants in small pots or compacted soil can exhaust their root space and stop growing.
7. Temperature and Climate Stress – Extreme heat slows photosynthesis, and cold snaps can damage roots and tissues.
8. Poor Fertilization Practices – Over-fertilizing causes salt buildup and nutrient lock-up, while under-fertilizing causes deficiencies.
9. Poor Air Circulation – Stagnant air encourages fungal diseases; plants need airflow for healthy respiration.
10. Lack of Regular Care and Monitoring – Ignoring early warning signs (yellowing leaves, spotty growth) lets problems worsen.
Each of the above issues will be explained in detail below, with signs to watch for and natural fixes you can try. Short, actionable tips follow each section. In most cases the solutions involve improving soil health, adjusting watering/light, and using organic products or methods. By identifying the root cause early and treating it naturally, your plants can recover and flourish.

1. Poor Soil Quality and Nutrient Deficiency
Soil is the foundation of plant health. When soil lacks key nutrients or has poor structure, plants cannot grow vigorously. Nutrient deficiencies often show up as yellowing leaves, weak stems, slow growth and poor water uptake. For example, low phosphorus or nitrogen causes plants to appear pale and stunted. The FAO notes that “deficiency in plant nutrients result in weak and stunted plants”. Likewise, Montana State University Extension reports that phosphorus-deficient plants “appear weak and stunted” with slow maturity. In Sri Lanka, degraded soils and erosion are common in many areas, so nutrient-poor soil is a frequent culprit.
Poor soil may also have bad texture (clayey or compacted) or low organic matter. This leads to poor aeration and drainage, which further limits root growth. In short, if the soil is the problem, your plants simply won’t get the food they need.
Signs Your Soil Is the Problem
Yellow or pale leaves (often uniformly, starting with older leaves).
Weak, thin stems and very slow overall growth.
Plants drooping quickly after watering, or drying out too fast (poor moisture retention).
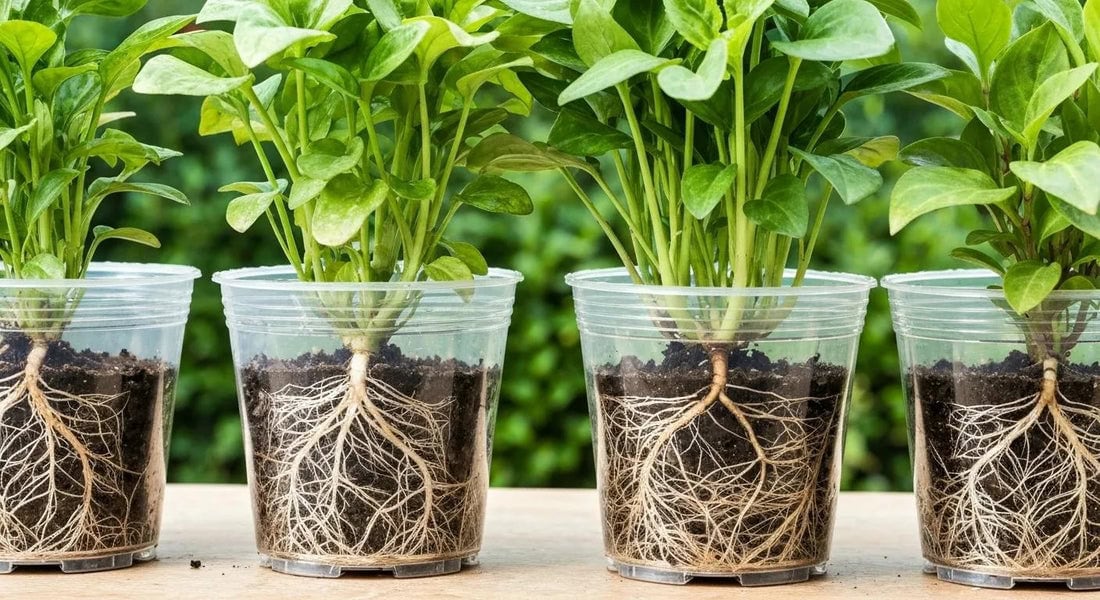
Poor root development (if you gently unpot and inspect, roots may be sparse or circling).
What You Can Do
Add Organic Compost or Vermicompost. Enrich the soil with well-decomposed organic matter. Compost or vermicompost supplies slow-release nutrients and beneficial microbes. Research shows that adding vermicompost “improves soil health” and leads to better plant growth. (In fact, vermicompost contains nutrients, hormones and enzymes that boost growth.) Mix compost into beds or potting soil before planting, or top-dress around plants.
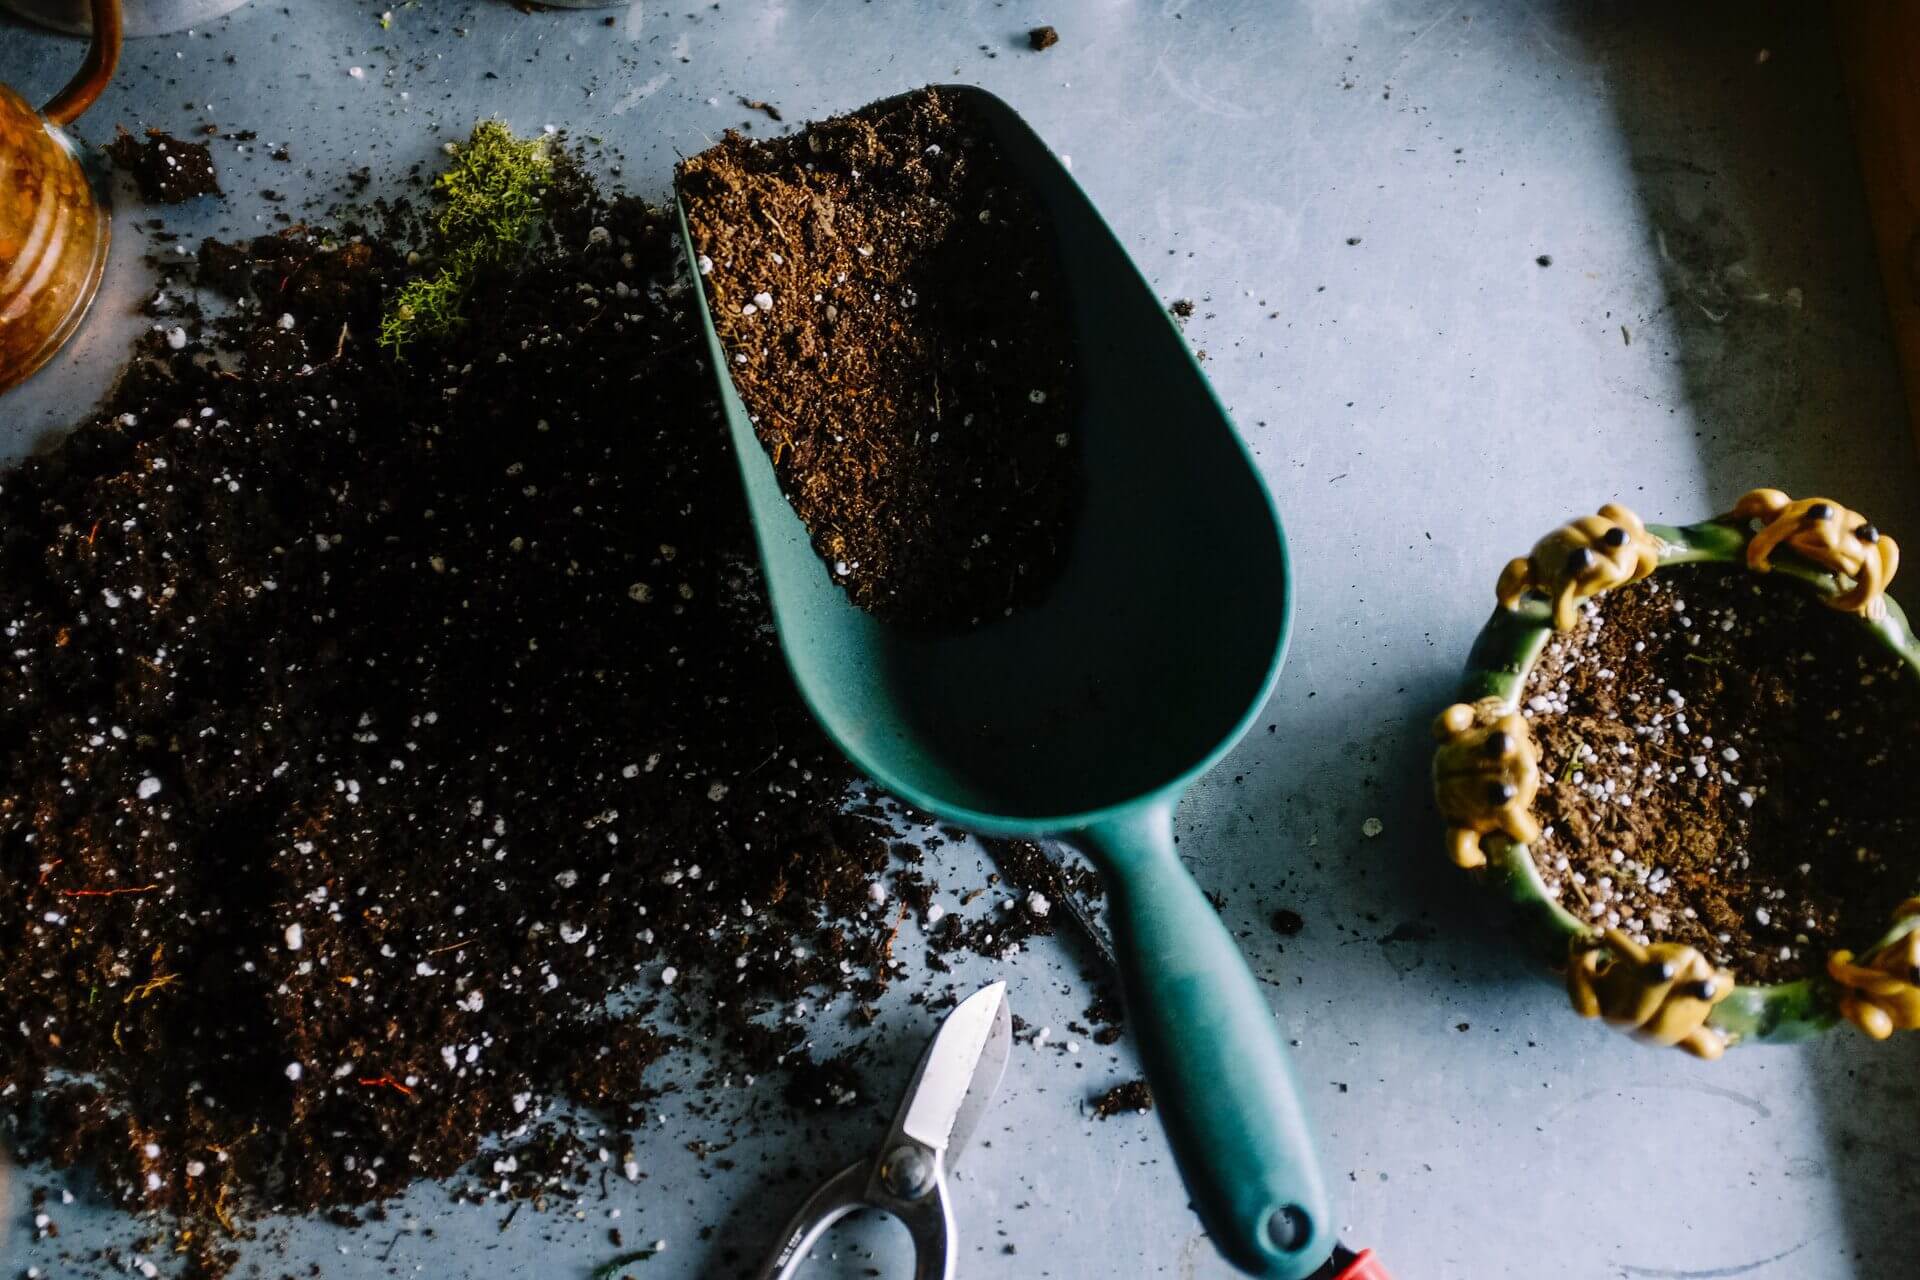
Use Natural Soil Conditioners. Organic amendments like well-rotted manure or coir (coconut peat) improve soil structure and nutrient content. For example, coco peat and sand can increase aeration in heavy soils. A 2024 study notes that vermicompost application “improves soil porosity and water retention”, overall enhancing seed germination and plant yield.
Improve Soil Aeration. Lightly turn or till soil before planting, and avoid packing it down. In containers, ensure soil is fluffy with good drainage. You can mix in perlite, coco peat or coarse sand to prevent compaction. Loose soil lets roots access water and air easily.
Test Soil Fertility. Whenever possible, have your soil tested. In Sri Lanka, low-cost soil test kits have been promoted so farmers know their nutrient levels. These tests check pH and nutrient levels (N, P, K). Knowing deficiencies lets you choose the right organic amendments.
By nourishing the soil, plants get stronger. After improving the soil, you should see greener leaves and faster growth over the next few weeks. If problems persist, you may need to investigate other factors (see below).
2. Overwatering or Underwatering
Water is vital, but both too much and too little can stunt growth. Overwatering saturates the soil and suffocates roots, leading to root rot. Underwatering starves roots of moisture, causing drought stress. Many beginners err on the side of too much watering, thinking it helps. In fact, Florida researchers warn that overwatering is a very common cause of plant disease: “Overwatering contributes to root rot diseases,” causing wilting, yellow leaves and stunted growth. Conversely, with mild water deficiency, plants become slow-growing and stunted.
How Watering Issues Affect Plant Growth
Root Rot from Excess Moisture: Waterlogged soil lacks oxygen, and pathogens like Pythium or Rhizoctonia can attack roots. The UF/IFAS Extension explains that overwatered plants often show “wilt, yellowing leaves and stunted growth” – symptoms mistakenly blamed on underwatering.
Drought Stress from Underwatering: When plants don’t get enough water, they cannot support cell expansion or photosynthesis. Early signs include wilting and dull leaves. Under mild drought, growth slows and plants remain small. In prolonged drought, plants may permanently wilt or cease growing.
Solutions for Proper Watering
Follow a Consistent Schedule. Rather than infrequent flooding, water regularly. Adjust based on weather – more during hot dry spells, less in rainy seasons. A good rule is to water deeply but infrequently, allowing roots to grow deeper. Missouri Botanic Garden advises watering plants thoroughly to 10-12 inches deep, rather than shallow daily watering.
Water at the Right Time of Day. Water in the early morning (before 10 AM) or late afternoon/evening. Early-morning watering reduces evaporation and lets leaves dry during the day, lowering disease risk. The UF/IFAS extension specifically recommends watering before 10 a.m. for best plant health. Avoid watering in the heat of midday or leaving wet leaves overnight.
Ensure Good Drainage. Use well-draining soil mixes and pots with holes. Raised beds or mounded rows help excess water drain away. You can incorporate gravel or sand at the bottom of containers for better flow. Good drainage prevents the wet conditions that lead to rot.
Mulch the Soil. Organic mulches (straw, compost, dried leaves) keep moisture levels even. Mulch reduces evaporation during dry periods and prevents the soil from becoming waterlogged in heavy rains. (Note: keep mulch a few inches away from plant stems to prevent collar rot.)
By avoiding both waterlogging and drought, you’ll keep roots healthy. Check moisture by sticking a finger into the soil: water if the top 5-8 cm is dry, and hold off if it’s still moist. Proper watering habits help ensure steady, continuous growth.
3. Lack of Sunlight or Too Much Sun Exposure
Light is fuel for plants, but the wrong amount causes trouble. Plants that get too little sun will stretch and become leggy, with weak, spindly stems and small leaves. Inadequate light also dramatically reduces flowering and yields. Researchers note that insufficient light is one of the most common reasons for leggy growth. On the other hand, too much intense sunlight – especially in hot tropical climates – can scorch leaves. Leaf scorch appears as browning or yellowing at the edges and tips, and in severe cases leaves dry up. Sunscald often follows hot, dry conditions when plants can’t take up water fast enough.
Symptoms of Improper Light
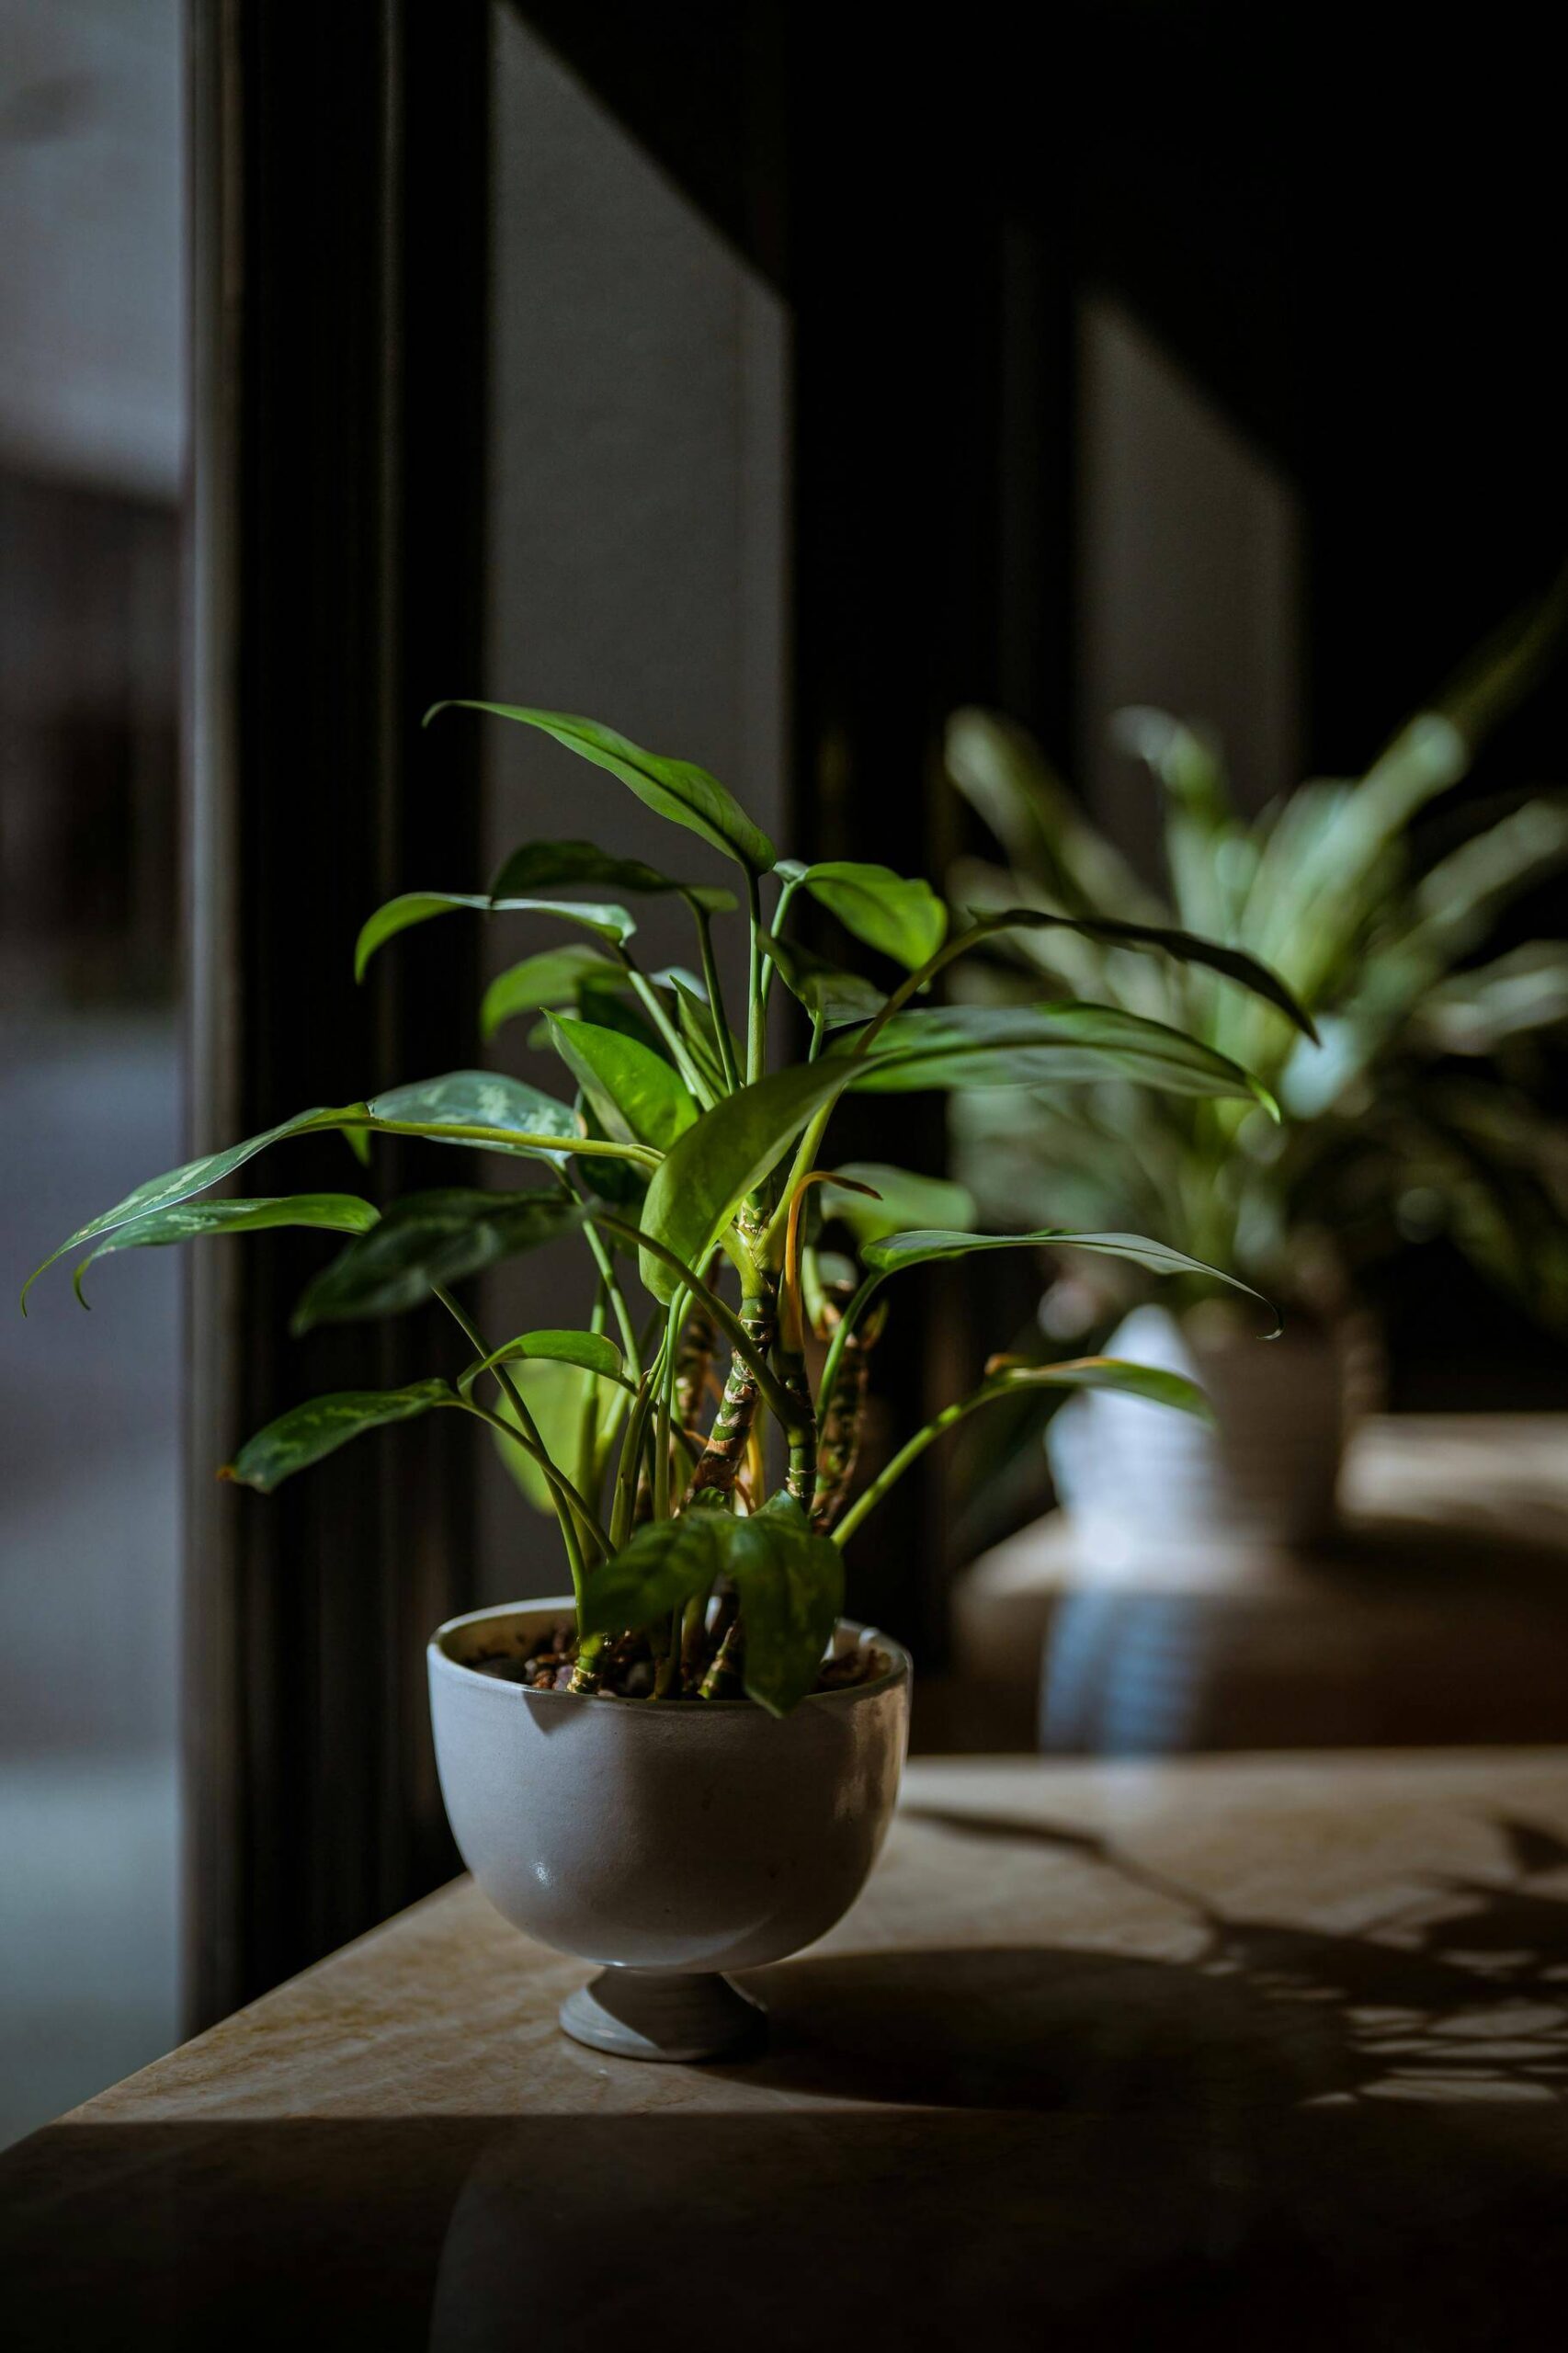
Leggy, Stretched Stems: Elongated, weak growth with sparse foliage, especially in lower light conditions. Houseplants or seedlings that bend or flop are lacking light.
Reduced Flowering / Small Leaves: In shade, flowering plants may produce few blossoms. Leaves may be smaller and a lighter green. Leggy plants often have “reduced flower production”, meaning fewer fruits or blooms.
Leaf Scorch / Browning: Leaves have brown or yellow margins and blotches. This occurs on the side of the plant facing the sun. Missouri Botanic Garden describes leaf scorch as browning of leaf margins or areas between veins, with dried, brittle tissue.
Bleached or Pale Leaves: In harsh sun, some green leaves may turn pale or white (sun bleaching).
How to Fix Light Problems
Match Plant to Light Conditions. Move sun-loving plants to full sun or partial shade as needed, and shade-tolerant plants to lower-light spots. For indoor planting, place shade-tolerant houseplants away from direct sun and move sun-loving indoor plants to bright spots. If seedlings are leggy, provide more light (supplemental grow lights or brighter window). The Garden for Wildlife learning center advises that if plants are “stretching towards a light source,” they need more light.
Use Shade Cloth or Nets. In very sunny locations (especially for sensitive vegetable crops or nurseries), provide partial shade with nets or shade cloth. For example, a 50-70% shade net over young vegetable transplants can prevent sunburn.
Rotate Potted Plants Regularly. In containers, plants often lean towards light. Rotate pots ¼ turn each time you water so all sides get light evenly. This prevents one side from overgrowing and becoming too bare on the shaded side.
Prune for Airflow and Light. Occasionally trim outer branches or leaves that shade inner parts of the plant. This is especially useful for indoor plants in tight spaces. Improved airflow (see section 9) also helps leaves dry more quickly after watering, preventing moisture buildup.
By giving plants just the right light, you’ll avoid both starvation and sunburn. Over time, properly lit plants will straighten up and produce larger, greener leaves and more flowers. If growing indoors, consider investing in a small grow light – keeping it on a timer to mimic a natural day.
4. Incorrect Soil pH Levels
Soil pH (acidity or alkalinity) greatly affects nutrient availability. Even if you add plenty of fertilizer, the wrong pH can lock out nutrients. Most vegetables and ornamentals prefer a slightly acidic to neutral pH (about 6.0-7.0). When soil is too acidic or too alkaline, key nutrients like phosphorus, nitrogen, and micronutrients become unavailable. For instance, USDA-NRCS research shows that “pH levels that are too high or too low… lead to a deficiency of many nutrients”. In plain terms, if pH is off, plants starve despite good soil. In Sri Lanka, many soils are naturally acidic (pH below 5.5), which can restrict growth unless limed.
Why Soil pH Matters for Plant Growth
Affects Nutrient Uptake: Nutrients exist in different chemical forms. At pH extremes, elements like phosphorus bind to soil particles and are not absorbed. The NC State Extension notes that lime (which raises pH) improves nutrient solubility, allowing plants to access calcium, nitrogen, etc.
Microbial Activity: Beneficial soil microbes also prefer certain pH ranges. Very acidic or alkaline soils have fewer friendly bacteria and fungi that help break down organic matter. This slows nutrient cycling.
Specific Plant Preferences: Some crops (e.g. tea, blueberries) tolerate low pH, while others (alfalfa, clover) need higher pH. In general, a pH between 6 and 7 is safe for most vegetables and ornamentals.
How to Balance Soil pH Naturally
Test Soil pH Regularly. Use a pH meter or kit. Sri Lankan agriculture has even introduced field soil test kits so farmers can check pH on-site. A quick test every season will tell you if pH is drifting.
Apply Lime for Acidic Soil. If soil is too acidic (pH < 6), apply agricultural lime (crushed limestone). Lime raises pH by neutralizing acidity. NC State Extension explains: “Lime will neutralize this acidity by dissolving… releasing a base that reacts with the acidic components”. Spread lime according to soil test recommendations (often a few hundred grams to a kilogram per square meter). Over time, lime improves nutrient uptake and root growth.
Add Organic Matter. Compost or aged manure tends to buffer soil pH. Organic matter slowly breaks down and can help even out pH swings. For example, coconut coir and compost often have near-neutral pH and will stabilize slightly acidic or alkaline soils.
Use Sulfur for Alkaline Soil. If soil is too alkaline (pH > 7.5), a small application of elemental sulfur or acidifying fertiliser (like ammonium sulfate) can lower pH gradually. However, do this carefully and ideally with a test kit, as overshooting can create new problems.
Choose Crop-Appropriate Plants. Some plants have pH tolerance ranges. If you have very acidic soil that’s hard to change, grow acid-loving crops (leafy greens, certain ornamentals). Conversely, if soil is alkaline, avoid acid-loving plants.
Maintaining proper pH ensures your added nutrients work. After adjusting pH, you should see healthier leaves and fewer deficiency symptoms. If unsure, call an expert or local agri extension; they often have guides for the ideal pH of each crop and how much lime to use.
5. Pest and Disease Attacks
Hidden enemies like pests and pathogens can also stop plants from growing normally. Common sap-sucking insects (aphids, mealybugs, spider mites) or chewing pests (caterpillars, beetles) physically damage foliage and divert energy. Diseases such as powdery mildew or fungal rots also weaken plants. For example, aphids on a young shoot can stunt its growth entirely. Caterpillars or mealybugs can cover new leaves, reducing photosynthesis. If pests go undetected, plants never reach full size and yield. Organic farming expert literature shows that biological control (using nature’s predators) is key to managing such pests without chemicals.
Common Pests That Stop Plant Growth
Aphids, Mealybugs, Mites: These small insects suck plant sap. Heavy infestations can cause curled, yellow leaves and slowed growth.
Caterpillars and Beetles: Chewing pests that eat leaves reduce the plant’s energy source. Stripped or ragged leaves mean the plant must expend energy to regrow foliage instead of growing new branches or fruits.
Whiteflies and Scale Insects: These suckers also weaken plants over time and can spread diseases.
Fungal Diseases: Mildews, blights, and rots (root rot, leaf spot) thrive in humid, stagnant conditions. For example, powdery mildew on young growth reduces photosynthesis; root rots can kill roots outright.
Natural Pest Control Methods
Neem Oil Spray. Neem oil is a natural botanical pesticide used for centuries. It contains azadirachtin, which repels and disrupts many insects. Spray infested plants (leaves and stems) with a diluted neem oil solution (per label instructions). Neem is safe for beneficial insects (when dried) and will reduce aphids, mealybugs and caterpillars.
Introduce Beneficial Insects. Encourage or release “good” bugs that prey on pests. Ladybugs and lacewings eat aphids; parasitic wasps attack caterpillar eggs and aphids. One organic guide notes that “aphids can be controlled with parasitic wasps, predatory midges or lady beetles”. You can purchase these beneficial insects or plant attractant flowers (marigolds, cosmos) that lure them.
Remove and Destroy Infected Parts. For minor infestations or small outbreaks, simply prune off the worst affected leaves or stems and dispose of them (do not compost if they have a disease). This removes the pest load and any disease source.
Regular Monitoring. Inspect plants weekly. Shake branches gently over a paper to catch aphids or mites. Early treatment (a simple water spray or targeted neem) can stop an infestation from exploding.
Avoid Broad-Spectrum Pesticides. These kill beneficial insects too. Instead, spot-treat problems organically.
By using natural controls, you maintain a balanced ecosystem. Over time, healthy plants will show fewer chewed leaves or sticky honeydew (aphid excrement). If pests recur, reapply treatments. Importantly, healthy soils and well-fed plants are less prone to attack than stressed, nutrient-starved plants.
6. Root Bound or Limited Growing Space
Plants confined in small pots or beds can run out of root space. A plant wants its roots to fill about 2-4 times the canopy area. When roots “totally consume the soil volume” in a container, they stop growing new roots. This is called being root bound or pot bound. At that point, the plant’s canopy growth slows dramatically because “the canopy…stops growing as a direct response to the lack of hormones made by new roots”. In other words, without fresh root tips to produce growth hormones, above-ground growth stalls. A root-bound plant often looks pale and droopy; waterings may run right through the pot because little soil is left to hold moisture.
Additionally, with most roots crowded, nutrient and water uptake is severely limited. The source explains that severely root-bound plants suffer “severe nutritional deficiency, as mineral absorption occurs primarily via new roots. No new roots means no eating!”. In practice, a root-bound plant cannot get enough food and water, so it cannot put energy into new leaves or flowers.
How Root Restriction Affects Growth
Nutrient Deficiency: Fewer roots mean less ability to absorb nutrients.
Water Stress: With little soil volume, the plant dries out quickly even with frequent watering. Yet watering more often can’t truly fix it if roots are already saturated.
Stunted Top Growth: New buds and leaves emerge very slowly or stop. Mature leaves may yellow and drop.
Visible Sign: You may see roots circling along the pot’s edge or emerging from drainage holes (a sure sign to repot).
What You Can Do
Repot into Larger Containers. If potted plants are root-bound, move them to a pot at least one size bigger (typically 2-3 times the soil volume). Gently tease apart circling roots as you repot. Use a high-quality potting mix rich in organic matter, which helps root expansion.
Loosen Soil Around Roots. For plants in the ground, carefully dig around the base and loosen the soil, allowing roots to spread outward. If roots are severely constricted by the pot, prune off any circling or girdling roots (making clean cuts) before replanting.
Use Good Potting Mix. In containers, ensure the soil is a light, airy mix (not heavy garden soil). You can add perlite or sand to improve aeration. A well-draining, fertile mix encourages new root growth.
Divide Overgrown Plants. For crowded perennials or clumping plants (like grasses or iris), consider dividing them. This gives each division more soil to grow into.
Plan Space Needs. In landscaping, give trees and shrubs plenty of room beyond the pot recommendation. Eco Agri recommends planning for a plant’s mature root zone (often 2-3 times its pot diameter).
Acting on root-bound issues often yields quick results. After repotting, water your plant well and give it a bit of shade for a day to reduce transplant shock. Over the following weeks, you should see new shoots and leaves as the roots explore their new space.
7. Temperature and Climate Stress
Plants have preferred temperature ranges, and Sri Lanka’s hot tropical climate can sometimes exceed these limits. Extreme heat (especially sudden heatwaves) damages plants by slowing photosynthesis and denaturing enzymes. A recent review notes that heat stress “decreases overall plant performance” by hindering photosynthesis, respiration and nutrient uptake. In practice, high heat causes leaves to wilt, drop, or develop scorched edges (see the “Light” section). Very hot soil can also burn roots.
Cold stress (from cool nights, especially in highland areas) also slows growth. Roots prefer warm soil; if temperatures drop too low, root activity nearly stops and nutrients aren’t absorbed. In severe cases (frosts or very cold spells), cell damage from ice crystals can kill root tissues. Even in the tropics, occasional cold snaps can stunt sensitive plants if not protected.
How Extreme Weather Impacts Plants
Heat Stress: Plants close stomata (leaf pores) to avoid water loss, but this also stops CO₂ intake, halting photosynthesis. Leaves may develop sunscald or wilt. Very high temperatures can even slow cell division, halting growth. (Studies show that plant productivity drops sharply beyond their optimum temp.)
Cold Damage: Chilly roots can’t absorb water well, causing leaves to droop. Frost can produce brown leaf spots. Chill injury usually shows as dark or water-soaked areas on leaves or seedlings. Young tender plants are most susceptible.
Humidity and Wind: Low humidity and hot winds dry plants rapidly. Conversely, humid hot conditions (without airflow) promote fungal diseases, which secondarily stunt growth.
Sudden Changes: Rapid swings (very hot days, cool nights) stress plants more than gradual changes.
Ways to Protect Plants from Climate Stress
Mulch Soil: A thick layer of organic mulch (coconut husk chips, straw, or shredded leaves) helps regulate soil temperature. In summer it keeps roots cooler and retains moisture; in a cold snap it provides insulation.
Water Wisely During Stress: Well-watered plants can better tolerate heat than dry ones. Prioritize deep watering before heat waves. But water early in the day so plant tissues dry off.
Use Shade or Greenhouses: In hottest months, provide temporary shade cloth over sensitive plants or set up shade houses. At home, potted plants can be moved into a shaded verandah or indoors. In farming, protective structures (netted tunnels or greenhouses with shade screens) buffer extremes.
Choose Climate-Tolerant Varieties: For hot lowland farms, select heat-tolerant vegetable varieties. For uplands, pick crops that withstand cooler nights. Native or local cultivars are often more resilient.
Ventilation and Airflow: Ensure good air circulation (see next section) so that plants do not bake in stagnant hot air. In greenhouses, use vents or fans.
Monitor Weather Forecasts: If a heat wave or cold snap is predicted, take action early: irrigate deeply, cover plants, or harvest ripe produce to save the crop.
By mitigating stress, plants maintain growth. After a period of extreme weather, new growth should resume if damage was avoided. Persistent stress (like chronic high heat) may reduce yields, but you can adapt by using these protective strategies.
8. Poor Fertilization Practices
Giving plants the right fertiliser is an art as well as a science. Too much fertilizer (especially chemical NPK) can burn roots or create salt buildup that harms growth. Conversely, too little fertilizer means plants run short of nutrients. In Sri Lanka, unbalanced fertiliser use has been linked to declining soil health. The FAO notes that “excessive use of fertiliser…[makes] it difficult for plants to absorb certain nutrients,” while nutrient deficiencies result in weak, stunted plants. In other words, both over- and under-fertilizing can cause stunted growth.
Effects of Over-Fertilizing and Under-Fertilizing
Over-Fertilizing: Excess salts from fertiliser can draw water out of roots (osmotic stress) and burn root tips. This leads to yellow leaf edges and quick wilting. It also often kills beneficial soil microbes. People may think a pale plant needs more fertiliser, but giving extra NPK to an already fed plant can worsen stunting.
Under-Fertilizing: A simple lack of nutrients (especially nitrogen, phosphorus, potassium) means plants can’t grow vigorously. New leaves will be small and pale. The plant essentially runs out of “fuel.”
Best Natural Fertilization Tips
Use Organic Fertilisers in Moderation. Organic options (compost, well-rotted manure, bone meal, fish emulsion or liquid manure) supply nutrients more gently than synthetic feed. For example, a diluted foliar spray of organic liquid fertiliser can give plants a boost without risk of burn. Always follow guidelines: even organic fertilisers should be applied in recommended amounts.
Apply Fertiliser During Active Growth. Feed plants when they are actively growing (spring and summer for most crops). Don’t fertilize at the end of the season when plants are dormant. Organic manures decompose slowly, so apply ahead of major growth spurts.
Check Soil Before Fertilising. Use soil or leaf tests to see what nutrients are low. Tailor your fertiliser choice to those needs. For instance, if soil test shows low nitrogen, use a high-nitrogen organic fertilizer like neem cake or green manure.
Avoid Fertilizer Burn: After application, water well. This helps distribute nutrients and prevents salt accumulation on roots.
Consider Slow-Release Organics: Products like composted manure, bone meal or rock phosphate release nutrients over time, feeding plants steadily. These also improve soil structure.
Rotate Nutrient Types: If you consistently plant heavy feeders (like cucumbers or tomatoes), rotate with a legume cover crop occasionally to naturally add nitrogen.
Remember: the goal is balanced nutrition. If your plant is not growing well, err on the side of gentle organic feeding rather than heavy doses. Over time, well-fed plants have stronger roots and fuller canopies. If problems persist, revisit section 1 and 4 (soil and pH), because fertiliser effectiveness depends on those factors.
9. Poor Air Circulation Around Plants
Good airflow is an often-overlooked factor. When plants are too crowded or in still, humid air, several problems arise. Stagnant air encourages fungal diseases like mildew, blight or black spot, all of which sap plant vigor. Even without disease, leaves need fresh air to exchange gases (plants “breathe” by exchanging oxygen and carbon dioxide through leaf pores). If air is still and humid, transpiration drops and stomata may clog, slowing photosynthesis. In greenhouses and nurseries, research shows ventilation dramatically cuts airborne fungus levels.
Why Airflow Is Important
Prevents Fungal Disease: Fungi thrive in moist, still air. Good ventilation dries the leaf surface and lowers humidity, making disease less likely to infect plants.
Strengthens Plants: A slight breeze causes plants to develop stronger stems (a process called thigmomorphogenesis). Indoor plants near a fan or outdoors in the breeze grow sturdier stems.
Improves Gas Exchange: Plants take in carbon dioxide and release oxygen through tiny stomata. Air movement ensures these gases are replenished and not trapped around the leaves.
How to Improve Air Circulation
Space Plants Appropriately: Don’t crowd seedlings or plants too tightly. Give each plant its own space as per guidelines. Proper spacing allows air to move freely between stems.
Prune for Airflow: Thinning out dense branches and leaves (especially in shrubs or hedges) lets air circulate inside the canopy. This reduces humidity around inner leaves.
Use Fans or Open Windows (Indoor Planting): For indoor planting, especially in closed rooms or terrariums, periodically run a fan or open a window to refresh the air.
Avoid Overcrowding Indoors: Indoor plant enthusiasts should resist placing all pots on a small shelf. Instead, spread them out or place them in different rooms if needed.
Monitor Humidity: In closed spaces, consider a small dehumidifier or silica packs if humidity is persistently high.
By ensuring moving air, you reduce disease pressure and improve plant health. Once ventilation is corrected, you may notice fewer spots or molds, and plants that no longer look limp or fuzzy. Healthy airflow works hand-in-hand with proper watering and pruning.
10. Lack of Regular Plant Care and Monitoring
Finally, sometimes the simplest reasons are the most overlooked. Plants need routine care. Neglecting common maintenance allows small problems to become big ones. For example, missing early yellowing on a few leaves can let a deficiency spread. Forgetting to prune can lead to overcrowding and disease. Eco Agri’s horticulturists emphasize that keeping an eye on plants is crucial.
Common Maintenance Mistakes
Ignoring Early Signs: A few discolored leaves or a slowed growth spurt can be the first clue of problems (nutrient shortage, pests, etc.). Leaving these signs unchecked is a mistake.
Infrequent Pruning: Dead, yellowing or damaged leaves and branches should be removed promptly. Overgrown branches can shade younger growth and harbor pests.
Not Rotating Crops: In vegetable gardens, planting the same crop in the same spot year after year can deplete certain nutrients and encourage disease build-up. Practice crop rotation where feasible.
Overlooking Weeds: Weeds compete for water and nutrients. Regular weeding ensures your plants get the resources they need.
Simple Plant Care Checklist
Weekly Checks: At least once a week, examine leaves and stems. Look for color changes, insect activity, and overall vigor.
Remove Dead Material: Snip off dead flowers, leaves or stems. This directs the plant’s energy to new growth.
Observe Growth: Keep a garden journal or photo log. Noting plant height, number of flowers, or leaf size every week helps you spot when growth stalls.
Clean Tools: Use clean, sharp shears and spades. Dull tools tear plants, and dirty tools can spread disease between plants.
Ask for Help Early: If you’re unsure, take a photo to a local extension office or send it to expert forums. Many agricultural departments or nurseries can diagnose common problems quickly.
Regular, hands-on care keeps small problems from sneaking up. By catching stress early, you give plants a better chance to recover. Over time, this diligence leads to healthier gardens with fewer surprises.
Final Thoughts: How to Revive Stunted Plants Naturally
In summary, identifying the root cause early is key. Start by checking soil and water, since 70-80% of growth problems come from those areas. Improve your soil with compost or organic fertilisers, adjust watering habits, and ensure your plants have the right light and space. Use natural, eco-friendly products: for example, applying compost tea or organic liquid fertiliser can kickstart growth without chemicals, and neem oil or beneficial insects take care of pests safely.
Eco Agri Solutions’ specialists in Sri Lanka recommend focusing on prevention: regularly feeding your soil, crop-rotating, and observing plants every week. If you do need products, we offer organic fertilisers (powder or liquid) and bio-pesticides tailored for local conditions.
For personalized advice or high-quality organic inputs, request a quote from Eco Agri Solutions. Our team can analyze your soil or plant sample and suggest solutions. Remember that reviving a stalled plant takes patience – after corrections, it may take a few weeks to see new growth. But with consistent organic care, most plants will recover and resume healthy growth.
By following the steps above and using the organic methods suggested, you’ll address the common reasons why plants stop growing. Healthy, vigorous plants not only yield better but also contribute to sustainable Sri Lankan agriculture. For more help or to supply your farm or garden with eco-friendly products, contact Eco Agri Solutions – we’re here to support your success!
Get the FREE Sri Lanka Planting Calendar 2026
Month-by-month guide. Yala/Maha seasons. Wet, dry & hill country crops. Delivered to your inbox.