How to Start Home Composting (Step-by-Step Guide & Mistakes)
What Is Home Composting and Why It Matters
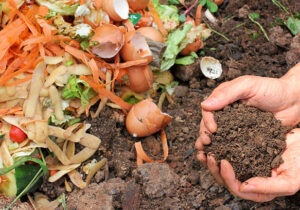
Home composting means recycling your kitchen and yard waste into nutrient-rich soil amendments. Compost is essentially decayed organic matter a carbon-rich organic fertilizer made from plants, food scraps and manure. It supplies essential nutrients (nitrogen, phosphorus, potassium) back to the soil and improves its structure. In Sri Lanka over 80% of household waste is organic and suitable for composting, so turning that waste into compost cuts landfill volume and recycles valuable nutrients.
Unlike quick-release chemical fertilizers, compost feeds plants slowly and builds long-term fertility. It enriches soil life and reduces the need for synthetic fertiliser. In fact, studies show compost-amended soils can hold more water and nutrients, improving drought resilience and plant growth. Composting your food waste also slashes methane emissions from landfills and lowers gardening expenses by replacing store-bought fertilisers.
What Compost Really Is (Simple Explanation)
Compost is simply decomposed organic waste. The FAO defines it as “a carbon-rich fertilizer derived from organic materials,” including kitchen scraps, crop residues or manure. Through aerobic decomposition (with air, moisture and microbes), these wastes turn into a dark, crumbly material rich in organic matter. In addition to nutrients (N-P-K), compost adds humus that improves soil structure, aeration and water retention. A good compost boosts soil fertility naturally, so crops thrive without synthetic fertiliser.
Why Compost Is Better Than Chemical Fertilizers
Organic compost releases nutrients gradually as soil microbes break it down, unlike many chemical fertilisers which can leach quickly. By feeding the soil microbes, compost improves soil health over time. For example, one study found vegetable beds with compost had significantly higher yields and nutrient density than beds with no compost. Compost also contains micronutrients and organic compounds that chemical fertilisers lack. Importantly, using compost reduces dependence on factory-made fertilisers cutting greenhouse gases and energy use associated with their production. In short, compost returns a broad spectrum of nutrients to the soil and helps sustain fertility, whereas synthetic fertilisers alone do not build soil structure.
Environmental Benefits of Composting at Home
Composting at home has several eco-benefits: it reduces household waste sent to landfill, improves soil health in gardens, and saves money on fertilisers. By diverting kitchen and yard waste into a compost bin, you decrease methane emissions from rotting waste in landfills. The composted material then becomes a valuable organic fertilizer, replacing the need for chemical inputs. Compost also helps soils hold more moisture and nutrients, which means less water usage and better plant growth. In Sri Lanka, for example, large composting projects (such as the Balangoda plant) convert tons of urban organic waste into thousands of kilograms of fertilizer, demonstrating how composting supports both urban waste management and agriculture. In short, home composting closes the nutrient loop you reuse your waste to feed your garden, cutting costs and environmental impact.
Benefits of Composting at Home for Gardeners
-
Improves Soil Structure and Fertility: Compost adds organic matter that loosens heavy clay, binds sandy soils, and feeds beneficial microbes. This makes beds richer and aerated. For example, adding compost has been shown to significantly boost soil organic carbon and nutrients (N, P, K), far more than using only synthetic fertiliser. Over time, your garden soil becomes more fertile and easier to work.
-
Boosts Plant Growth Naturally: Gardens with compost generally produce healthier plants. A multi-year study in Canada found vegetables grown in compost-amended plots yielded higher harvests and much greater nutrient density than plots without compost. In practice, compost fertiliser for vegetables means stronger root systems, better blooms and bigger harvests without chemical residues.
-
Reduces Dependence on Store-Bought Fertilizers: By feeding your plants with home-made compost, you can cut down or even eliminate buying synthetic fertiliser. This saves money and protects plants from fertilizer burn. Since compost contains a balanced mix of nutrients and improves soil nutrition over time, gardeners can gradually use less packaged fertiliser.
-
Ideal for Home Gardens, Pots, and Urban Spaces: Composting works on any scale. Even small pots or balcony gardens benefit from a scoop of compost mixed into potting soil. Compost tea (a dilute, liquid form of compost) can be used to water indoor plants as an organic liquid fertilizer. Whether you have a backyard or just a few potted herbs, compost gives you an all-natural fertiliser for indoor planting and outdoor gardening alike.
What You Can and Cannot Compost at Home

-
Green Materials (Nitrogen-Rich Waste): These decompose quickly and include fruit and vegetable scraps, coffee grounds, tea leaves, fresh grass clippings, and plant prunings. Such “greens” are moist and high in nitrogen; they feed the microbes in your pile.
-
Brown Materials (Carbon-Rich Waste): These are dry and help balance moisture. Examples are dried leaves, straw or hay, shredded newspaper/cardboard, and sawdust or wood chips. Browns provide carbon and air pockets. A good practice is to layer roughly 2-3 parts brown to 1 part green (about 3:1 by volume) to keep the pile balanced.
-
Items You Should Never Compost: Avoid meat, fish or bone scraps; dairy products (milk, cheese, yogurt); oily or greasy foods; and cooked leftovers. These materials attract pests (rats, dogs, flies) and can cause odors or imbalance. Also do not compost pet wastes or highly diseased plants. Diseased plant material (e.g. blighted leaves, viral or fungal infections) can introduce pathogens into your compost, and most home piles don’t get hot enough to kill them. Instead, discard contaminated plants in the trash.
Types of Home Composting Methods (Choose What Fits You)
-
Compost Bin Method (Best for Small Homes): A closed bin or tumbling composter is convenient for most backyards. It contains the pile and looks tidy. You simply layer greens and browns in the bin. A bin helps retain heat and moisture, speeding up decomposition. Tumblers make turning easier (you just spin the container) for good aeration.
-
Pit Composting Method (Best for Home Gardens): Dig a compost pit or trench in your garden and fill it with waste. This is low-maintenance, just cover the pit. It’s suitable for tropical climates, but ensure it’s not waterlogged in rainy season. The compost forms underground and can be dug out later.
-
Bucket or Bokashi Composting for Apartments: If you have no outdoor space, you can use a sealed kitchen composter or bokashi bucket. Bokashi (fermentation) units let you put even meat and dairy scraps in a sealed bucket with special bran. After fermentation, material is buried or mixed into soil. Electric mini-composters (home kitchen machines) can also quickly process food scraps into a soil-like material.
-
Vermicomposting (Using Earthworms): Worm bins are great for balconies or small yards. Red wiggler worms eat kitchen scraps and turn them into worm castings, a very rich compost. A worm bin is usually odor-free if managed well. It’s an efficient indoor/outdoor system: add food scraps (avoid citrus or onions), keep the bedding moist, and harvest worm castings every few months.
Step-by-Step Guide: How to Compost at Home
-
Choose the Right Compost Location: Pick a level spot out of direct baking sun, ideally on soil or grass (so worms can enter). It should be convenient for adding kitchen scraps. In apartments, a sheltered balcony or kitchen corner with a bin also works. Good airflow is helpful.
-
Select a Compost Bin or Container: Use a compost bin, tumbler or simply make a pile in a dedicated corner. For small spaces, start with a 60-80cm sized bin. If using a pit, a hole about 50-80cm deep is typical. An enclosed bin helps prevent pests. Ensure whatever container you choose has some drainage holes.
-
Layer Green and Brown Materials Properly: Begin with a base of coarse material (twigs or straw) to allow air flow. Then add a layer of green (kitchen scraps) and a layer of brown (dry leaves, shredded paper) alternately. A rule of thumb is about 2-3 parts brown to 1 part green. Too many greens (like just fresh kitchen waste) will make the pile wet and smelly; too many browns and it’ll decompose very slowly.
-
Maintain Moisture (Not Too Wet, Not Too Dry): Aim for moisture like a wrung-out sponge. Mix materials so it’s damp but not soggy. If the pile is too dry, decomposition slows or stops. If too wet, it becomes anaerobic and smelly. In a tropical climate, rainfall can over-saturate a pile, so cover it with a tarp or dry leaves during heavy rains. In dry weather, you may need to add a little water to keep it moist.
-
Turn or Mix the Compost Regularly: Every week or two, stir or turn the pile (or rotate a tumbler). This aerates the compost, mixing the materials so everything heats evenly. Turning introduces oxygen, which helps microbes work faster and prevents odors. In summer a weekly turn is ideal; in cooler months, turning monthly is still beneficial.
-
Monitor Temperature and Decomposition: A hot, steaming center indicates active composting. Ideally, the pile should reach 50-65°C (122-149°F) if it’s well balanced. Even without measuring, you’ll feel heat. As it cools, the materials will shrink and darken. If the pile never heats up, check ratio and moisture, you may need more greens or water.
-
Know When Your Compost Is Ready to Use: Finished compost looks dark brown or black, crumbly and earthy-smelling. It’s ready when most original scraps aren’t recognizable. This usually takes 2-6 months for a well-managed hot pile, or longer (up to a year) for cold composting. If it’s still largely undecomposed, just keep adding materials and turning until it finishes.
Common Composting Problems and Easy Fixes
-
Bad Smell from Compost -Causes and Solutions: A sour or rotten smell usually means the pile is too wet or compacted. Fix it by adding more dry brown materials (leaves, straw, shredded paper) to soak up moisture and create air pockets. Re-mix the pile, and cover it to keep rain out. Also, be sure no large clumps of kitchen scraps are exposed -bury any particularly strong-smelling items under fresh brown matter or soil. This balances moisture and airflow.
-
Compost Not Decomposing Properly: If your pile sits unchanged, it may be too dry or lacking nitrogen. Check moisture first, the pile should feel damp. If it’s dry, water it and turn it. If you have only browns, add more greens (grass clippings or veggie scraps) to boost nitrogen. You can also sprinkle a little finished compost or garden soil onto the pile to introduce microbes and help kick-start breakdown. Ensuring the pile is not too small (at least 1m³ for heat) and in a partly shaded spot also helps.
-
Too Many Flies or Pests: Flies, maggots or rodents are attracted to uncovered food scraps. To prevent this, bury green (wet) scraps under brown material or soil each time you add them. This hides the food from flies. Turn the pile regularly- a hotter, well-turned pile is less appealing to pests. Avoid putting any meat, dairy or cooked foods at all, as these strongly attract rats and flies.
-
Compost Too Dry or Too Wet: A dry, non-heating pile needs moisture sprinkle water and mix it in. If the pile is too wet (water puddling, slime or a rotten smell), add dry browns and turn. As [31] notes, “too much water or too little air” causes slime. Adjust the balance of greens and browns: too many greens = wet (add browns); too many browns = dry (add greens). Covering the pile during heavy rains and uncovering in drought helps maintain the right moisture.
How Long Does Composting Take at Home?
A lot depends on your method. A hot compost pile that’s well-turned and balanced can be ready in as little as 4-12 weeks under tropical conditions. In practice, household compost often takes a few months of active management to finish. A cold (passive) pile takes longer often 6-12 months or even up to two years because it decomposes slowly without frequent turning.
Week-by-Week Timeline (Example):
-
Weeks 1-4: Pile heats up (may reach 50+°C). Decomposition of soft greens begins.
-
Months 2-3: Temperature may fall as initial material breaks down. Gradually add new material and keep turning.
-
3-6 Months: Continued breakdown. The pile should shrink and darken. At this point, older layers will look like rich soil.
Factors That Affect Speed:
-
Weather: Warm, humid climates (like Sri Lanka’s) speed up composting. Cold or rainy weather slows it.
-
Material Size: Smaller pieces compost faster. Chop or shred large branches and garden trimmings.
-
Turning Frequency: Frequent turning (weekly in summer) aerates and mixes the pile, greatly speeding the process.
How To Use Finished Compost in Your Garden
-
Using Compost for Vegetables: Mature compost makes an excellent organic fertilizer for vegetables. Work a layer (5-10cm) of finished compost into vegetable garden beds before planting. The improved soil fertility can boost yields. (Indeed, research shows vegetable plots getting annual compost applications produced markedly higher yields than unfertilized plots.)
-
Compost for Flower Plants: For flowerbeds, mix compost into the topsoil when planting or topdress annually. Compost slowly releases nutrients that support blooms over the season. It also improves drainage in heavy soil, so flower roots stay healthy.
-
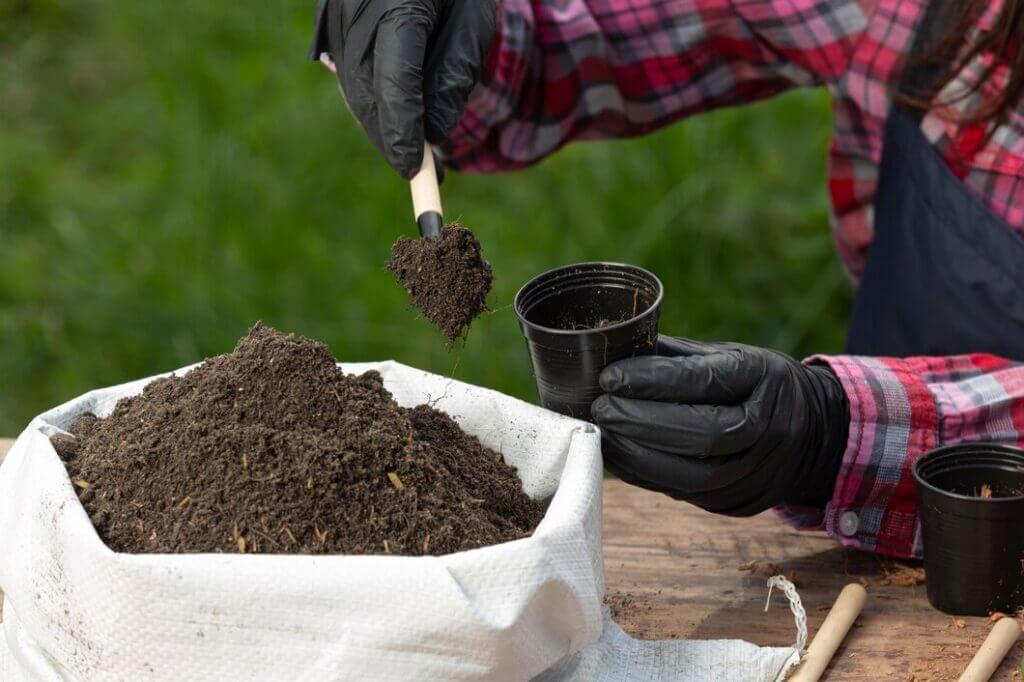
Compost for Pots and Indoor Plants: Mix compost into potting mix (up to about one part compost to three parts soil or so) to enrich indoor plants and balcony gardens. Compost can be used in a liquid form too: brew compost tea by steeping compost in water for 24-48 hours. This organic liquid fertilizer delivers nutrients and beneficial microbes quickly to houseplants and potted herbs.
-
Mixing Compost with Garden Soil (Best Ratios): As a general guideline, blend compost into garden soil at roughly a 1:3 ratio (compost:soil) for planting. For potted plants, use slightly more (up to 25-30% compost in potting mix). This ensures nutrients are abundant but the mix isn’t too “hot” for young roots. When sowing seeds, use a lighter mix as per seed packet instructions.
Tips to Make High-Quality Compost Faster
-
Chop Waste into Smaller Pieces: Cutting or shredding kitchen scraps and yard waste speeds decomposition. Pieces no bigger than your finger (2-5 cm) decompose much faster.
-
Maintain Proper Airflow: Use a container or make a looser pile so air circulates. Adding coarse browns (twigs, straw) in the base and between layers creates air pockets. Turning the pile regularly introduces oxygen, which drives faster composting and prevents bad odors.
-
Balance Green and Brown Waste: Keep roughly 2-3 parts brown to 1 part green. Too much green (wet material) makes the pile soggy; too much brown makes it slow. A balanced mix heats up well and rots completely.
-
Use Natural Compost Activators: Adding a scoop of finished compost or a sprinkle of manure can “seed” your pile with beneficial microbes and enzymes. This jump-starts decomposition. As one source notes, adding handfuls of already decomposed compost introduces active microbes that speed things up. Fresh manure (cow or rabbit, well aged) can also provide extra microbes and nitrogen.
Home Composting Mistakes Beginners Should Avoid
-
Adding the Wrong Materials: Avoid dumping meat, dairy, oils or diseased plants into your bin. These items can attract pests or spread pathogens. Stick to plant-based kitchen scraps and yard waste (as detailed above).
-
Ignoring Moisture Levels: A common error is leaving the compost too dry or letting it get waterlogged. Check moisture often -it should be damp like a sponge. Adjust by adding water or dry material as needed. Neglecting moisture means the pile will stall (too dry) or smell (too wet).
-
Not Turning the Compost: People often add scraps and then forget to aerate the pile. Without turning, the inner material may remain undecomposed and odors can develop. Schedule regular mixing or tumbler rotations. Even once every week or two makes a big difference in speed and health of the pile.
-
Expecting Instant Results: Composting is a process, not a quick trick. It usually takes months for waste to fully turn into soil. Impatience leads some to give up or add more waste without letting the pile catch up. Understand that home composting requires time and ongoing care. Eventually, you’ll be rewarded with rich compost if you stick with it.
Is Home Composting Suitable for Small Homes and Apartments?
Yes, with a bit of planning, even limited space gardeners can compost successfully. There are several compact methods: vermicomposting (worm bins) and Bokashi systems are especially popular for apartments. Worm bins can live on a balcony or under the sink and quietly turn veggie scraps into castings, while Bokashi fermentation lets you include meat/dairy in a sealed bin with no smell. Both are essentially odor-free and fit in tight spaces.
Composting in Limited Spaces: Use a small tumbler or a dedicated bucket composter under the sink. You can also “dig-and-drop” by burying scraps in a pot of soil. For balcony gardens, set a mini-bin with coarse drainage at the bottom.
Odor-Free Composting Tips: Choose enclosed or indoor-friendly systems. Keep the pile balanced and covered to minimize smell. In tropical climates, temperature is high enough that closed bins rarely smell foul if managed well.
Best Compost Bins for Apartments: Look for worm bins, Bokashi kits or electric composters (which grind and heat scraps). There are even countertop units for quick composting. These are pricier, but they make the process hands-free and clean.
Even without a garden, you can still use your compost: feed houseplants (mix in potting soil), share with neighbors, or donate to a community garden. Every bit of compost you produce helps reduce waste and enrich soil somewhere.
Final Thoughts -Turn Daily Waste into Premium Soil Nutrients
Composting at home is a simple, earth-friendly way to nourish your garden and cut waste. By composting, Sri Lankan gardeners tap into a natural system that recycles our daily waste into valuable fertilizer. Over time, consistently using compost leads to long-term gains in soil quality, plant health and savings on inputs. As the FAO notes, composting “replenishes nutrients to the soils” and can be essential for smallholder farmers in developing countries, and it’s equally valuable for household plots and kitchen gardens. Every bucket of scraps that becomes compost means less landfill burden and healthier, more organic-rich soil.
At Eco Agri Solutions, we have seen firsthand how effective organic compost is. We encourage every household in Sri Lanka to start composting. If you need guidance or organic fertilizer products, feel free to request a quote from Eco Agri. Our experts can advise on compost systems and supplies suited to your garden. By turning kitchen waste into compost, you’re not just fixing common gardening mistakes, you’re also creating a sustainable future for your plants, your wallet and the environment.
Get the FREE Sri Lanka Planting Calendar 2026
Month-by-month guide. Yala/Maha seasons. Wet, dry & hill country crops. Delivered to your inbox.